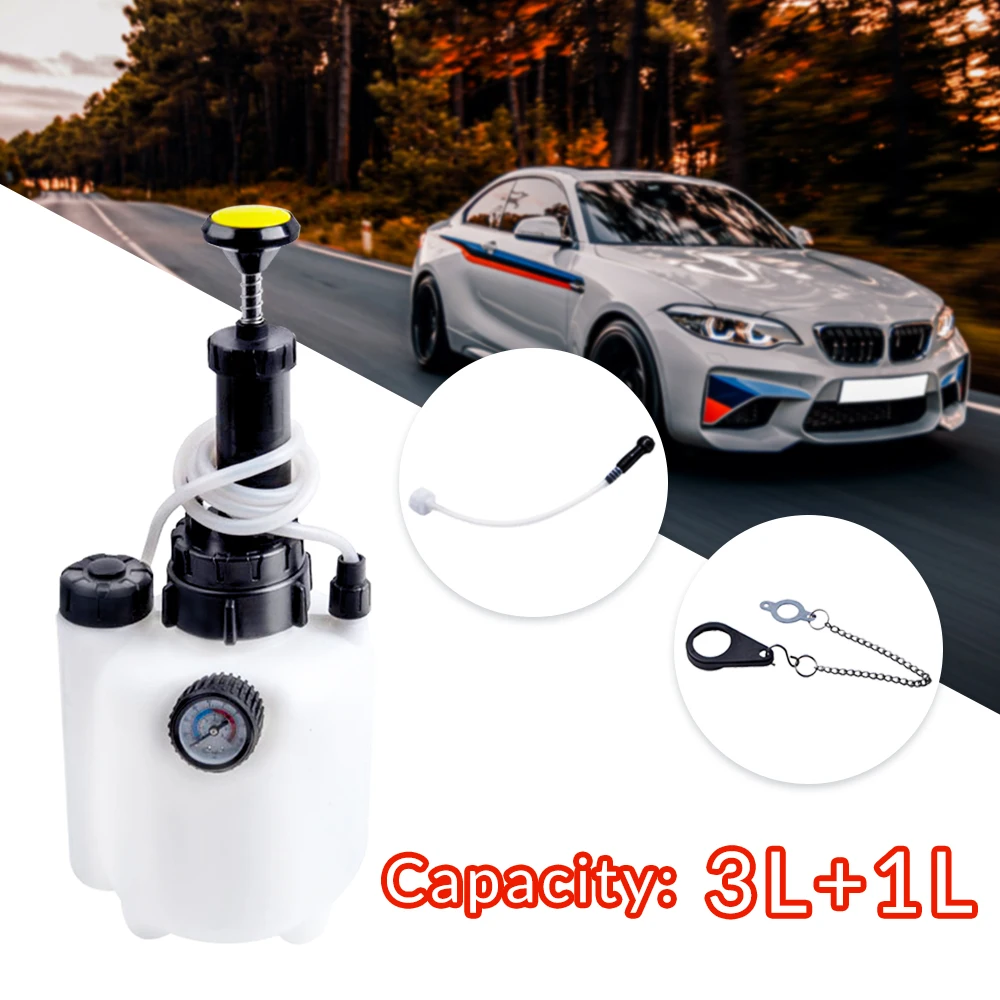
Manual Brake Clutch Fluid Bleeder Kit Car Brake Oil Change Pot Oil Change Bleed Tool Set System Hand Pump Manual Pressure Tool
113.39$ Original price was: 113.39$.77.10$Current price is: 77.10$.
Manual Brake Bleeder
-
Large capacity of 3L, allowing for replacing brake fluid at a time
-
Pressure range: 0-6bar / 0-80PSI
-
40-1/4″ translucent hose supports free moving
-
With quick coupler, quick and convenient
-
Air release valve for air pressure exhaust
Easy to Use
Operating Instruction
-
1.Make sure no pressure remains inside the unit. Pressure can be released from the release valve on the side of the pump.
-
2.Remove the cap on top of the unit and fill the unit with new brake fluid. Make sure there is no remaining old fluid or debris in the tank.
Filling Procedure
-
1.Select a suitable adaptor from the selection provided with the unit. Installl the adaptor to the master cylinder of the brake system
-
2.Open the brake bleeder screw and connect it to the waste oil bottle with accessories all installed. Pour new brake fluid into the refill tank reservoir, then pump the handle to transfer new fluid and at the same time old fluid will enter into waste oil bottle. (Grease the bleeder screw for seal if there are too much bubbles in the hose) When you see the old fluid become clean in the waste oil bottle, disconnect the nipple. Repeat the process on all 4 wheels. Attention: Brake fluid should be added to a proper liquid level. Too much or too little is bad for brake system maintenance.
-
3.When the brake fluid is flowing, ask a helper to pump the brake pedal while you watch the fluid run through the translucent tube.
-
4.Once the process is complete, release the pressure by pressig down the release valve by the side of the pump. After releasing, disconnect the fluid supply hose from the adapter on the master cylinder. Note: Do not disconnect the adaptor before releasing the pressure.
-
5.Replace the master cylinder cap on the vehicle
-
6.Dispose the waste brake fluid in the bleeding container safely.
| Origin | Mainland China |
|---|---|
| Color | White |
| Exterior | polyethylene |














![2023 Bluetooth 5.3 FM Transmitter for Car, [Stronger Dual Mics Deep Bass Sound] , 48W PD&QC3.0 Car Charger Bluetooth Adapter](https://kuykookey-1ff13.kxcdn.com/wp-content/uploads/2024/02/230737-vihcfs-247x296.jpg)


